How the Rib Circular Knitting Machine Knits a Beanie Hat
Nov 08, 2024
On this page
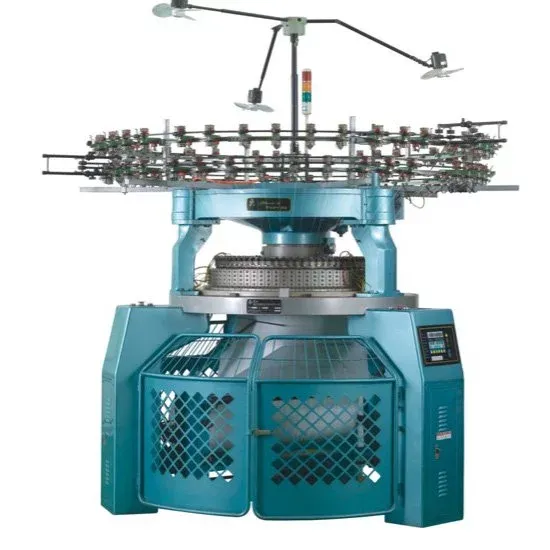
Beanie hats are a popular and stylish accessory for cold weather. Whether you're making one for yourself or crafting hats to sell, using a rib circular knitting machine is one of the most efficient and professional ways to create these cozy garments. Ribbed knit patterns, in particular, give beanie hats a stretchy, form-fitting texture, perfect for ensuring both warmth and comfort. In this article, we will discuss how rib circular knitting machines knit a beanie hat, the materials and tools needed, and the steps involved in creating a double-sided ribbed hat.
The circular knitting machine will automatically create the tube shape of the hat, knitting continuously in the round. Once the fabric reaches the desired length, stop knitting. Next, take a second color of yarn (if you want a two-tone design) and repeat the knitting process for the second side of the beanie. You can opt for a different rib pattern or use the same technique for consistency. This second side will mirror the first and be the same size and shape. Once both sides of the beanie are knitted, it's time to stitch them together. Align the edges of the two sides and use an embroidery needle to sew them together. Make sure to match the color of the yarn to the sections you're stitching to maintain a clean and uniform appearance. You can use a whip stitch or a similar technique for a seamless finish. After the stitching is complete, use your scissors to trim any excess yarn or loose threads. This is a crucial step to ensure that your finished beanie looks neat and professional. Finally, you can add any decorative elements or tags to your beanie. If you want to personalize the hat, you can embroider a logo or pattern using embroidery needles. This adds a special touch to your creation. If desired, attach a label to one side of the hat to indicate the inside from the outside. Once all the sewing and decoration is done, place the beanie on a hat mold or a round object that matches the desired size. Leave it for a while to ensure it takes the perfect shape. If you don’t have a mold, you can stretch the hat over a bowl or plate to give it structure. Knitting a beanie hat using a rib circular knitting machine is a simple and efficient way to create a stylish and cozy accessory. The ribbed pattern not only adds texture but also gives the hat elasticity, making it perfect for a snug fit. The key to a successful project lies in choosing the right yarn, adjusting the knitting machine for the desired stitch pattern, and carefully stitching the two sides together. With a little practice and the right tools, you can create beautiful beanie hats in a variety of colors and patterns, adding a personal touch to your winter wardrobe or offering them as handmade gifts or products.

The circular knitting machine will automatically create the tube shape of the hat, knitting continuously in the round. Once the fabric reaches the desired length, stop knitting. Next, take a second color of yarn (if you want a two-tone design) and repeat the knitting process for the second side of the beanie. You can opt for a different rib pattern or use the same technique for consistency. This second side will mirror the first and be the same size and shape. Once both sides of the beanie are knitted, it's time to stitch them together. Align the edges of the two sides and use an embroidery needle to sew them together. Make sure to match the color of the yarn to the sections you're stitching to maintain a clean and uniform appearance. You can use a whip stitch or a similar technique for a seamless finish. After the stitching is complete, use your scissors to trim any excess yarn or loose threads. This is a crucial step to ensure that your finished beanie looks neat and professional. Finally, you can add any decorative elements or tags to your beanie. If you want to personalize the hat, you can embroider a logo or pattern using embroidery needles. This adds a special touch to your creation. If desired, attach a label to one side of the hat to indicate the inside from the outside. Once all the sewing and decoration is done, place the beanie on a hat mold or a round object that matches the desired size. Leave it for a while to ensure it takes the perfect shape. If you don’t have a mold, you can stretch the hat over a bowl or plate to give it structure. Knitting a beanie hat using a rib circular knitting machine is a simple and efficient way to create a stylish and cozy accessory. The ribbed pattern not only adds texture but also gives the hat elasticity, making it perfect for a snug fit. The key to a successful project lies in choosing the right yarn, adjusting the knitting machine for the desired stitch pattern, and carefully stitching the two sides together. With a little practice and the right tools, you can create beautiful beanie hats in a variety of colors and patterns, adding a personal touch to your winter wardrobe or offering them as handmade gifts or products.
Next: Circular Knitting Needle Lengths: Choosing the Right Size for Your Project
Previous: Understanding Rayon Fabrics: Key Features and Uses
About Us
We have been committed to manufacturing all types of circular knitting machines with great quality and reasonable price for a long time. Our professional team is highly specialized and problem-solving oriented. We put the most effort into meeting your knitting demands, achieving a win-win situation.
Categories
Useful Links